How to fix No Volume in Windows 11?
If multiple audio output devices are available, check that you have the appropriate one selected. Here's how:
-
Select the Speakers icon on the taskbar.
Note: If you don't see Speakers displayed, it may be in the overflow area. Select Show hidden icons to check there.
-
Next, select the arrow to open a list of audio devices connected to your computer.
-
Check that your audio is playing to the audio device you prefer, such as a speaker or headphones.
If this doesn't help, continue to the next tip.
The audio troubleshooter might be able to fix audio problems automatically.
To run the troubleshooter:
-
Go to Search in the taskbar, type audio troubleshooter, and select Find and fix problems with playing sound from the results to launch the troubleshooter.
-
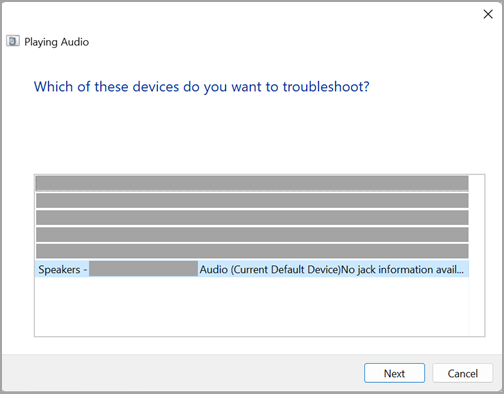
Select Next, and then select the device you want to troubleshoot and then continue through the troubleshooter.
You can also launch the troubleshooter from audio Settings:
-
Select Start > Settings > System > Sound > Troubleshoot common sound problems and select Output devices or Input devices.
If running the troubleshooter doesn't help, continue to the next tip.
To check for updates:
-
Select Start > Settings > Windows Update and select Check for updates.
Open Windows Update -
Do one of the following:
-
If the status says, "You're up to date," go to the next tip.
-
If the status says, "Updates are available," select Install now.
-
-
Select the updates you want to install, then select Install.
-
Restart your PC and check if your sound is working properly.
If that didn't solve your problem, continue to the next tip.
Try these steps:
-
Check your speaker and headphone connections for loose cords or cables. Make sure all cords and cables are plugged in.
-
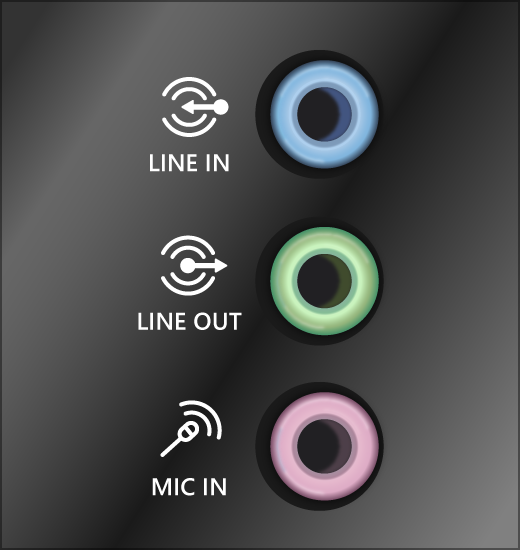
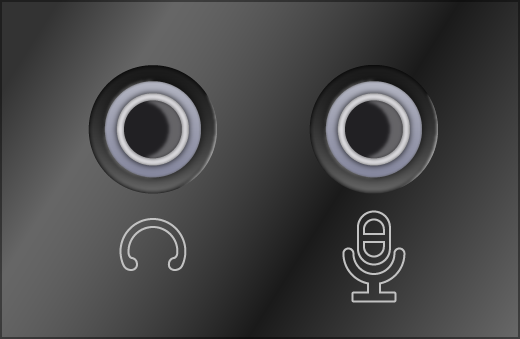
If you have multiple 5mm jacks to plug into, especially on a surround sound system, make sure all cords and cables are plugged into the correct jack.
-
If it’s not clear which jack goes with which cord, consult your hardware manufacturer, or try the most obvious outputs one at a time and see if they work.
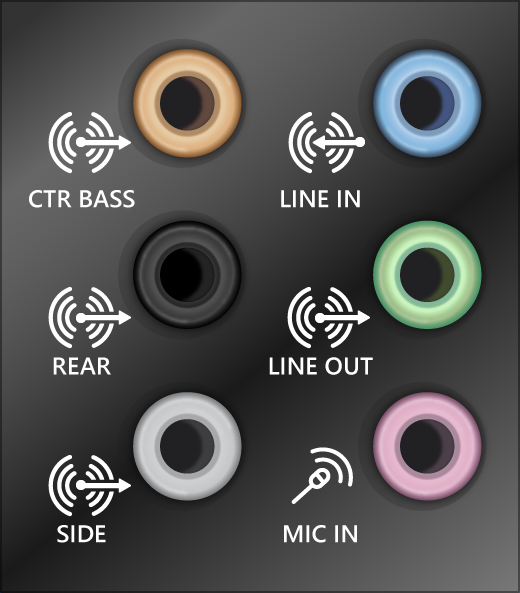
Note: Some systems use a green jack for output and a pink jack for mic input and others will be labeled "headphone" or "microphone."
-
-
Make sure the power is turned on.
-
Make sure the mute setting is not turned on and try turning up all the volume controls.
Note: Some speakers and apps have their own volume controls. Be sure to check them all.
-
Try connecting your speaker and headphones to a different USB port.
-
It's possible that your speakers won't work when your headphones are plugged in. Unplug your headphones and see if that helps.
If you're still having audio problems, see the next sections for additional troubleshooting.
Check to make sure your audio devices aren't muted and haven't been disabled.
-
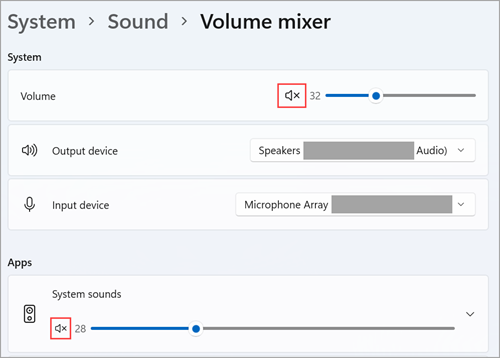
Select and hold (or right-click) the Speakers icon on the taskbar, and then select Open Volume mixer.
Note: If you don't see Speakers displayed, it may be in the overflow area. Select Show hidden icons to check there.
-
You’ll see a set of volume controls for your devices. Make sure none of them are muted. If any of them are muted, you’ll see an "x" next to the volume control . To unmute do one of the following:
-
Select the volume control and adjust to the desired volume level.
-
Select the Unmute speakers icon .
-
-
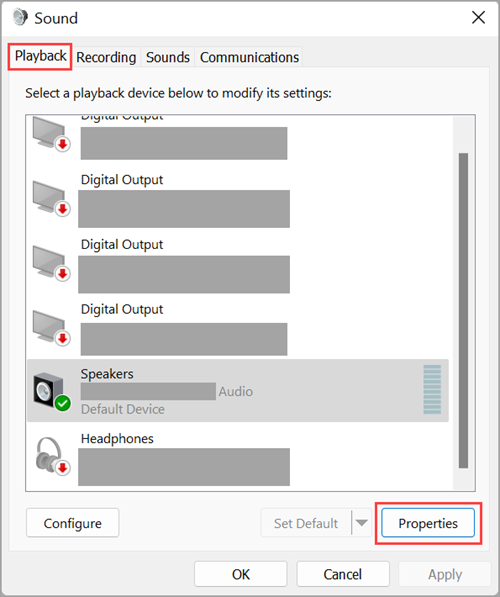
Check your device properties to make sure that your devices have not been disabled by mistake. Select Start > Settings > System > Sound .
-
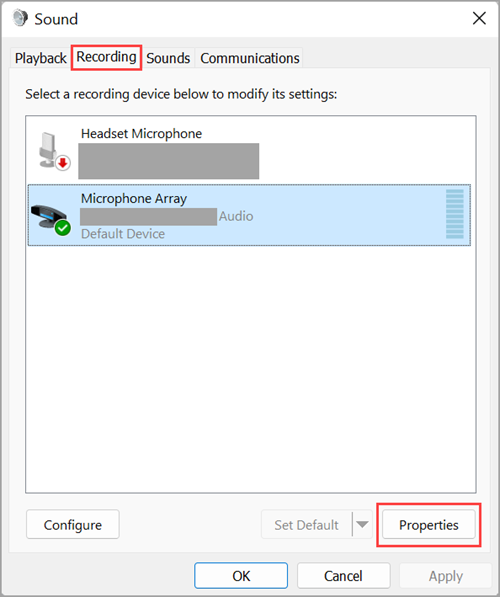
Under Advanced, select More sound settings and select either the Playback (output) or Recording (input) tab.
-
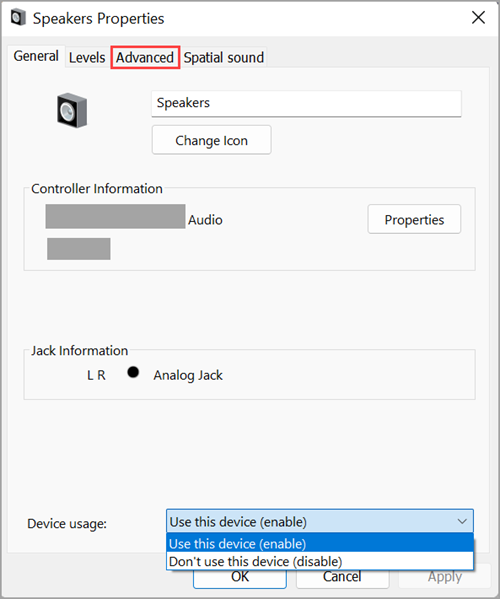
Select your device and then select Properties.
-
Next to Device usage, check that Use this device (enable) is selected from the list for the output and input devices.
If that didn't solve your problem, continue to the next tip.
Hardware problems can be caused by outdated or malfunctioning drivers. Make sure your audio driver is up to date and update it if needed. If that doesn't work, try uninstalling the audio driver (it will reinstall automatically). If that doesn't work, try using the generic audio driver that comes with Windows. If you're having audio issues after installing updates, try rolling back your audio driver.
To update your audio driver automatically:
-
In the search box on the taskbar, type device manager, then select it from the results.
-
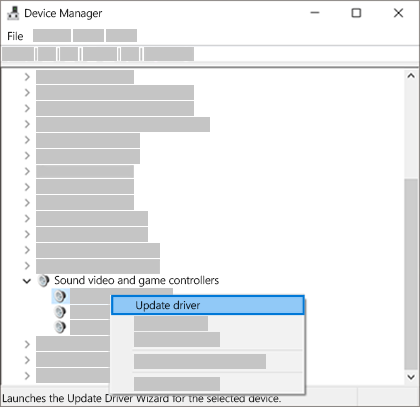
Select the arrow next to Sound, video and game controllers to expand it.
-
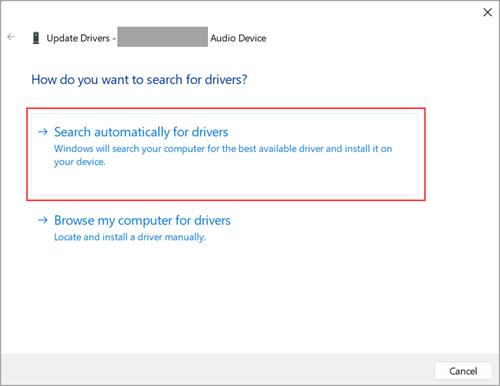
Select and hold (or right-click) the listing for your sound card or audio device, such as headphones or speakers, select Update driver, then select Search automatically for drivers. Follow the instructions to complete the update.
If Windows doesn't find a new driver, look for one on the device manufacturer's website and follow those instructions. If that doesn't work, try uninstalling your audio driver.
To uninstall your audio driver:
-
In the search box on the taskbar, type device manager, then select it from the results.
-
Select the arrow next to Sound, video and game controllers to expand it.
-
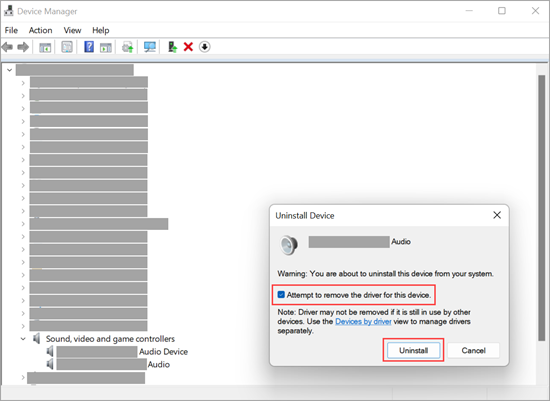
Select and hold (or right-click) the listing for your sound card or audio device, select Uninstall device, select the Attempt to remove the driver for this device check box, and then select Uninstall.
-
Restart your PC.
Note: Be sure to save your documents and any other current work before you restart.
-
This restart will automatically prompt your PC to reinstall your audio driver.
-
To restart, select Start > Power > Restart .
-
If those options didn’t work, try using the generic audio driver that comes with Windows.
To use the generic audio driver that comes with Windows:
-
In the search box on the taskbar, type device manager, then select it from the results.
-
Select the arrow next to Sound, video and game controllers to expand it.
-
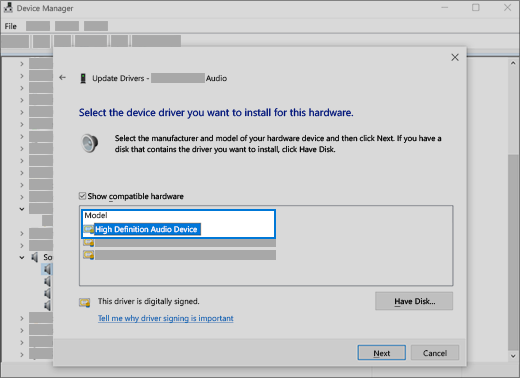
Select and hold (or right-click) the listing for your sound card or audio device, then select Update driver > Browse my computer for drivers > Let me pick from a list of available drivers on my computer.
-
Select the audio device whose driver you want to update, select Next, and then follow the instructions to install it.
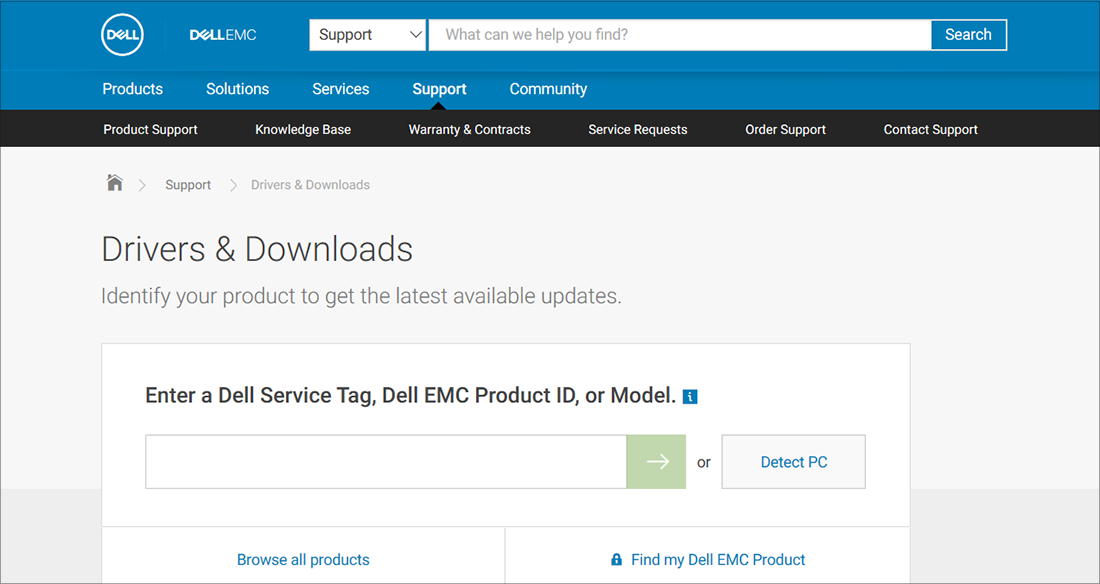
If these steps didn't solve your audio issue, visit your device manufacturer’s website and install the most recent audio/sound drivers for your device. The following is an example of a driver download page for a sound device manufacturer.
If you have audio issues after installing updates
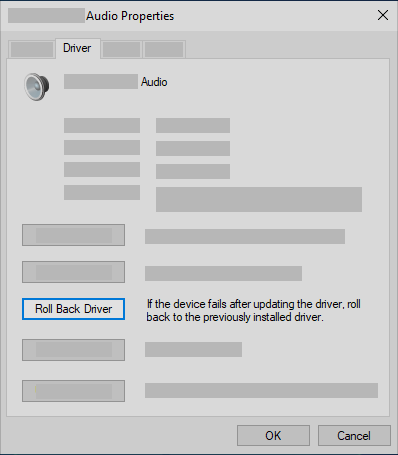
If your audio was working before you ran Windows Update and now isn’t working, try rolling back your audio driver.
To roll back your audio driver:
-
In the search box on the taskbar, type device manager, then select it from the results.
-
Select the arrow next to Sound, video and game controllers to expand it.
-
Select and hold (or right-click) the listing for your sound card or audio device, then select Properties.
-
Select the Driver tab, then select Roll Back Driver.
-
Read and follow the instructions and then select Yes if you want to roll back your audio driver.
If rolling back your audio driver didn't work or wasn't an option, you can try to restore your PC from a system restore point.
Restore your PC from a system restore point:
When Microsoft installs updates on your system, we create a system restore point in case problems arise. Try restoring from that point and see if that fixes your sound problems. For more info, see "Restore from a system restore point" in Recovery options in Windows.
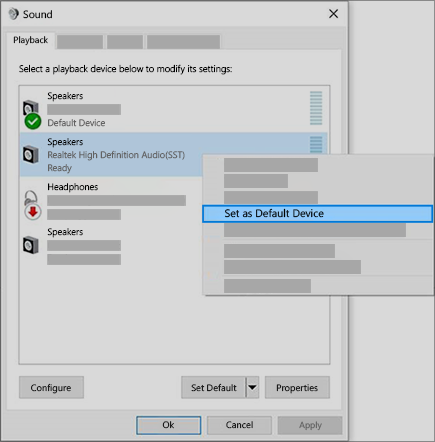
If you're connecting to an audio device—such as headphones or speakers—using USB or HDMI, you might need to set that device as the default audio device. If you’re using an external monitor that doesn’t have built-in speakers, make sure that the monitor isn’t already selected as your default output device. if it is, you won’t have any audio. You can check that when you set your default output audio device. Here’s how:
-
In the search box on the taskbar, type control panel, then select it from the results.
-
Select Hardware and Sound from the Control Panel, and then select Sound.
-
On the Playback tab, select and hold (or right-click) the listing for your audio device, select Set as Default Device, and then select OK.
However considering you have already purchased Restoro and would like us to assist you in doing that utilizing a remote session, please contact our support and they will be happy to help you.
Email: support@restoro.com
No Comments